Table of Contents
- What You'll Need Before You Start
- How to Prepare Your Garment for DTF Transfer Pressing
- DTF Heat Press Settings for Different Fabrics
- How Long to Press DTF Transfers: Timing and Dwell Time
- How to Apply DTF Transfers With an Iron at Home
- Positioning and Peeling Your DTF Transfer Correctly
- DTF Transfer Troubleshooting: Fixing Common Problems
- Care and Durability: Washing and Maintaining Your Pressed Transfers
- Frequently Asked Questions
Last Updated: October 11, 2026
What You'll Need Before You Start
You can press DTF transfers at home without expensive equipment. You can start with items you likely already own. The key is understanding what each tool does, its realistic limitations, and when you need to upgrade.
This guide is written for home setups: household irons, compact presses, and first-time pressers. If you already work on a commercial heat press, go straight to our heat press settings and instructions page for the full heat press walkthrough and videos.
Heat Source Options and Their Limitations
Household Iron
An iron is free if you already own one, but the soleplate heats unevenly and pressure depends entirely on you. You can get good results with patience and the technique below.
Cricut Easy Press or Similar Compact Press
A compact press ($80-$200) delivers more consistent, even heat than an iron with less effort. See our Cricut heat press guide for DTF transfers for compact press technique.
Full-Size Heat Press
A heat press ($200-$600+) gives the most consistent heat and pressure, the fastest press times, and the best wash durability. Compare models in our best heat press for DTF transfers guide.
Complete Home Setup Checklist
Before you press your first transfer, gather and verify these items. For tools worth adding later, see our list of must-have heat press accessories.
Workspace and Safety
- Hard, flat surface (a wooden cutting board under your ironing board works well for an iron)
- Flat, stable work table that won't shift under pressure
- Ventilation: open window, fan, or exhaust vent
- Fire extinguisher or water source within arm's reach
- Protective cover sheet: Teflon sheet, parchment paper, or a T Seal silicone finishing sheet
- Heat-resistant gloves or silicone finger guards
- Clear workspace free of clutter
Pressing Tools
- Your chosen heat source (iron, compact press, or full heat press)
- Timer with second markings
- Infrared thermometer to verify actual surface temperature
- Ruler or shirt alignment guide for consistent placement
- Heat-resistant tape to hold transfers in place
Materials and Verification
- DTF transfers
- Garments pre-washed and dried
- Extra blanks or scrap fabric for test presses, especially when trying a new fabric (our heat press starter kits include practice tees and transfers)
- Carbon paper to test for uneven pressure
Verifying Pressure and Temperature Consistency at Home
Every press heats a little differently, even two of the same model, so verify your setup before your first real garment:
Temperature Verification
Set your heat source to your target temperature (290-310°F for cotton and cotton-poly blends) and let it fully stabilize. A heat press platen needs 5-10 minutes. Use an infrared thermometer to check the center, corners, and edges. If one area reads noticeably hotter, you have a hot spot; adjust your setting and test again.
Pressure Verification
Place carbon paper on your platen and press for 5 seconds. Even, dark marks mean consistent pressure. Light or missing marks indicate uneven pressure. Check that your platen is level and your garment is lying flat.
Dwell Time Consistency
Use a timer for every single press. Counting in your head introduces 1-3 second variations, which compound across a batch.
What to Gather
- A heat source (iron, compact press, or heat press)
- A hard, flat pressing surface or Easy Press mat
- A cover sheet (Teflon sheet, parchment paper, or T Seal)
- Your DTF transfer
- A garment ready to press
- A timer or clock
- A thermometer (optional but helpful for accuracy)
- Heat-resistant gloves or finger guards
- A ruler or alignment guide
- Extra blanks for testing
If you're using an iron, you already have most of what you need. If you're considering a heat press, the We Print U Press Handbook includes a 9-question checklist to help you choose before you buy. Having the right setup prevents wasted transfers and frustration.
How to Prepare Your Garment for DTF Transfer Pressing
Pre-pressing removes moisture and wrinkles so the transfer bonds evenly. Press the area where the design will go before placing your transfer:
- Home iron: 5-10 seconds on a hard, flat surface
- Easy Press: 5 seconds, then slide the garment to a fresh, dry section of the mat
- Heat press: 3-5 seconds, then open, smooth, and reposition
Skip this step and you risk poor adhesion and premature peeling.
DTF Heat Press Settings for Different Fabrics
Temperature depends on fabric. Time depends on your tool. Using the wrong settings causes peeling or cracking after washing. Not sure which blanks hold up best? Start with our guide to the best fabrics for DTF transfers.
| Fabric | Temperature | Notes |
|---|---|---|
| Cotton and cotton-poly blends | 290-310°F | Reliable results on most garments |
| 100% polyester | 270-285°F | Heat sensitive. Always test on a scrap first |
Cotton Fabric Settings
Cotton and cotton-poly blends: set your heat source to 290-310°F and use medium-heavy pressure. When in doubt, err on the heavier side, because DTF transfers bond better with more pressure. On an iron, use the high or linen setting with no steam.
Polyester and Blended Fabric Settings
Cotton-poly blends use the same 290-310°F setting as cotton. 100% polyester needs a lower 270-285°F and more practice. Polyester can scorch or fail to bond if pressed incorrectly, so keep extra blanks on hand and do a test press on a scrap of the same fabric before your final garment. Pressing rayon or viscose? Use our viscose fabric heat press settings instead.
How Long to Press DTF Transfers: Timing and Dwell Time
Dwell time (how long you hold heat and pressure) depends on your tool:
| Tool | Press Time | Pressure |
|---|---|---|
| Home iron | 30-45 seconds per section | Medium-heavy, straight down |
| Cricut Easy Press | 15-30 seconds | Medium-heavy, both hands |
| Heat press | 10-15 seconds | Medium-heavy, set on the machine |
Peel the film hot, then always do a second press to seal the design. If you seal with a T Seal, keep the temperature under 300°F. Use a timer for every press, because guessing leads to inconsistent results.
How to Apply DTF Transfers With an Iron at Home
An iron works well for beginners, small batches, and testing. Follow these steps:
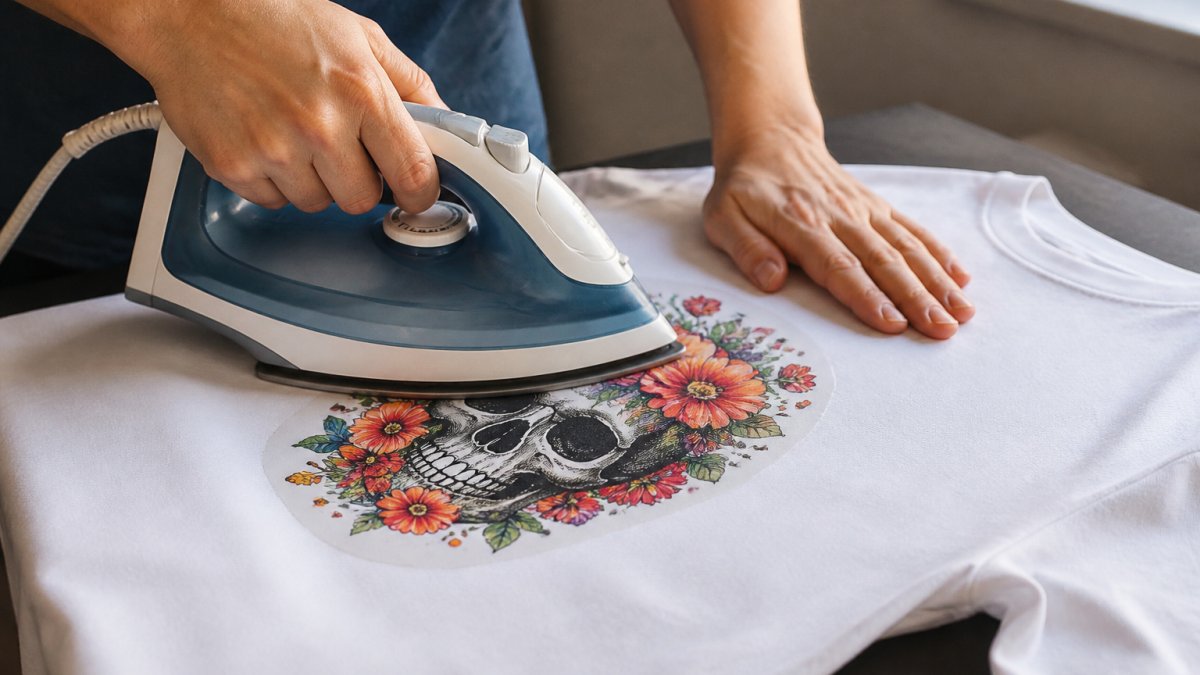
- Prep the iron. Turn off steam completely and empty the water reservoir. Steam is the number one cause of lifting and failed transfers with a home iron. Set the iron to 290-310°F (high or linen setting) for cotton and cotton-poly, or 270-285°F for 100% polyester.
- Pre-press. Iron the design area for 5-10 seconds on a hard, flat surface.
- Position and cover. Place the transfer print-side down, then cover it with a Teflon sheet or parchment paper.
- Press in sections. Press straight down on one section for 30-45 seconds with medium-heavy pressure. Overlap each section by about half an inch. Never glide the iron back and forth, which shifts the design and creates uneven heat.
- Press from the back. Turn the garment inside out and press the reverse side for another 15-20 seconds to fully bond the adhesive.
- Peel hot. Peel the carrier film while it's still hot, slowly, at a 45-degree angle.
- Seal. Cover the bare transfer with parchment paper, a Teflon sheet, or a T Seal and press again for 10-15 seconds. If you use a T Seal, keep the temperature under 300°F. Let the garment cool completely before folding or wearing.
Using an Easy Press instead? The steps are the same except for timing: press 15-30 seconds, then flip and press the back for 10-15 seconds. The press-from-the-back step applies to irons and Easy Presses only; it is not needed on a full heat press.
Positioning and Peeling Your DTF Transfer Correctly
Measure placement carefully: left-chest designs 3-4 inches from neckline and 2-3 inches from left edge; full-front designs centered and 4-5 inches from neckline. Use our DTF transfer size chart to match design size to each garment. Use heat-resistant tape to secure corners.
Our transfers are printed on hot peel film, so peel the carrier film while it's still hot, right after you lift the iron or open the press. Peel slowly and steadily at a 45-degree angle. If any part of the design lifts, lay the film back down and press again: 10 more seconds with an iron or Easy Press, or 5 more seconds on a heat press.
Press With Confidence: The DTF Transfer Handbook →
DTF Transfer Troubleshooting: Fixing Common Problems
Transfer failures stem from temperature, pressure, or preparation. Diagnosing which one is wrong saves time and transfers. For issues not covered here, see our full DTF troubleshooting guide.
How to Diagnose a Failed Transfer
Before adjusting settings, answer these questions:
Did the entire transfer peel off? The problem is under-pressing (too little dwell time, too low temperature, or too little pressure).
Did edges or corners lift? The problem is uneven pressure. Check that your garment is flat, your platen is level, and you're applying consistent downward force.
Does it feel stiff or plastic-like? Over-pressing (too much heat or too long dwell time) causes this.
Does the transfer look faded? The garment wasn't pre-pressed or pressure was too light.
Did ink lift with the film when peeling? The transfer wasn't fully bonded. Lay the film back down, press again, and peel slowly.
Common Problems and Solutions
| Problem | Root Cause | Diagnostic Test | Solution |
|---|---|---|---|
| Transfer peels after 1-5 washes | Under-pressed | Wash a test garment; transfer lifts easily | Add 2-3 seconds dwell time or increase pressure. Confirm you did the second sealing press. Test again before pressing a full batch. |
| Transfer peels at edges only | Uneven pressure | Use carbon paper test (see setup section); marks are lighter at edges | Check that garment is flat and platen is level. Apply firmer, more consistent downward pressure. |
| Transfer feels stiff or plastic-like | Over-pressed or too hot | Touch the transfer; it feels rigid and doesn't flex with the fabric | Lower temperature by 10°F and reduce dwell time by 2-3 seconds. |
| Ink looks faded or washed out | Weak adhesion from no pre-press or light pressure | Press a new transfer with pre-press; compare appearance | Always pre-press. Apply medium-heavy, even pressure across the entire transfer area. |
| Ink lifts with the film during peel | Not fully bonded (too little heat, time, or pressure) | Peel slowly; watch whether ink stays on the film | Lay the film back down and press again (10 seconds iron or Easy Press, 5 seconds heat press), then peel hot and slowly. |
| Wrinkles or bubbles under transfer | Garment not smooth before pressing | Look at the garment before pressing; wrinkles are visible | Pre-press the garment and smooth out wrinkles with your hand before placing the transfer. |
| Transfer ink cracks after a few washes | Over-pressed ink or hot dryer | Flex the garment; cracks appear in the ink | Lower temperature by 5-10°F and reduce dwell time by 2-3 seconds. Tumble dry low or hang dry. |
| One corner or area didn't adhere | Uneven pressure or transfer shifted during pressing | Look at the failed area; it's usually a corner or edge | Secure the transfer with heat-resistant tape before pressing. Check platen levelness. With an iron, overlap sections and never glide. |
| Transfer feels soft but peels after washing | Incomplete adhesion despite feeling set | Wash a test garment in cold water; transfer lifts | Increase dwell time or pressure. Confirm your heat source is actually reaching temperature with an infrared thermometer. |
| Garment fabric is scorched or yellowed | Temperature too high | Fabric is visibly darkened or smells burned | Lower temperature immediately and test on scrap fabric first. 100% polyester should stay at 270-285°F. |
Systematic Troubleshooting Workflow
When a batch fails, follow this process to isolate the problem:
Step 1: Test One Variable at a Time
Don't change temperature and dwell time simultaneously. If your batch peeled, increase dwell time by 3 seconds and keep temperature the same. Press a test garment, wash it, and evaluate before adjusting further.
Step 2: Keep a Pressing Log
Record the date, fabric type, temperature, dwell time, and result. After three batches, patterns emerge that become your reference guide.
Step 3: Wash Test Garments Before Declaring Success
Always wash a sample from each batch before pressing the rest.
Step 4: Verify Your Heat Source Is Accurate
If results remain inconsistent after multiple adjustments, use an infrared thermometer to check actual platen temperature.
When to Abandon a Batch
If more than 50% of a batch fails, stop and diagnose before pressing more transfers. Continuing to press with wrong settings wastes transfers and money. Spend 10 minutes troubleshooting instead, or book a live video support session so our team can walk through your setup with you.
Care and Durability: Washing and Maintaining Your Pressed Transfers
When applied at the right temperature, time, and pressure, our DTF transfers are rated for 100+ washes. To get there, wash inside out in cold water, tumble dry on low or hang to dry, and never iron directly on the printed design. Avoid bleach and fabric softener. For the full routine, read how to wash DTF shirts, and see how long DTF transfers last for realistic lifespan expectations.
Pressing DTF transfers at home is achievable with the right technique and settings.
If you're ordering transfers and want detailed pressing guidance, Press With Confidence: The DTF Handbook from We Print U Press covers settings for irons, Cricut Easy Press, and heat presses.

Start with the settings we've outlined here, test on a scrap garment, and adjust based on results. Every press is a little different, so testing is part of the process. Your first batch may not be perfect, that's normal. When you're ready for your next project, browse our ready to press DTF transfers.
Frequently Asked Questions
Can I press DTF transfers with a household iron instead of a heat press?
Yes. Turn the steam off completely, set the iron to the high or linen setting (290-310°F for cotton and cotton-poly), cover the transfer with a Teflon sheet or parchment paper, and press straight down in overlapping sections for 30-45 seconds each with medium-heavy pressure. Then flip the garment and press the back for 15-20 seconds. An iron works best for beginners and small batches. For more consistent results across many garments, a heat press delivers more even temperature and pressure. Our Press With Confidence handbook includes step-by-step instructions for home pressing.
What temperature should I use when pressing DTF transfers?
Use 290-310°F for cotton and cotton-poly blends, and 270-285°F for 100% polyester. Polyester is more sensitive to heat, so always do a test press on a scrap of the same fabric first. Every press heats a little differently, so verify your actual temperature with an infrared thermometer if results are inconsistent.
How do I know when to peel the DTF transfer film after pressing?
Our transfers are printed on hot peel film, so peel while the film is still hot, right after pressing. Peel slowly at a 45-degree angle, and if any ink lifts, lay the film back down and press again. After peeling, always do a second finishing press with a T Seal sheet, parchment paper, or a Teflon sheet to seal the design. If you use a T Seal, keep the temperature under 300°F.
Why is my DTF transfer not sticking to the garment?
Poor adhesion usually comes from too little heat, pressure, or time. Confirm your heat source reaches 290-310°F for cotton (270-285°F for polyester) and use medium-heavy pressure, erring heavier. Pre-press the garment to remove moisture and wrinkles, and if you're using an iron, make sure steam is off. Skipping the second sealing press also reduces wash durability. The troubleshooting section above covers additional fixes for stubborn adhesion problems.